NotificationCompatを用いた、通知の実装方法を説明しています。
ここでは、テキストのみの通知や通知をタップしてアプリを起動するといった、通知機能の基本的な実装方法を説明しています。
通知の実装はAndroid8.0以上とそれ未満で一部異なりますが、ここで説明している方法であればどちらにも対応可能です。
通知の概要
通知機能を実装する場合、以下のような手順が必要です。
- 通知チャンネルの作成
- 通知オブジェクトの作成
- 通知の実施
特に「通知チャンネルの作成」は、Android8.0以上で必須となっているため、これがないとエラーとなります。また、「通知オブジェクトの作成」でも、一部の仕様が変わっているため、注意が必要です。
実装例
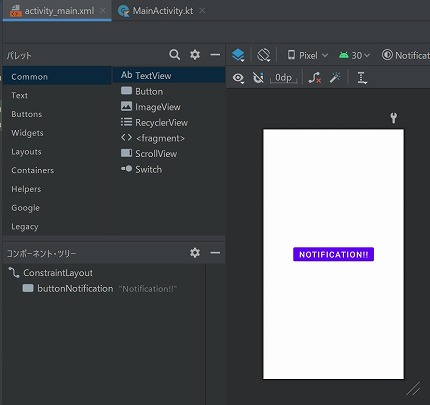
レイアウト
activity_main.xml
メインアクテビティのレイアウトです。
ボタンを押すと通知を実施するようにします。
実装方法
MainActivity.kt
最初に説明した通り、以下の順に行っています。
- 通知チャンネルの作成
- 通知オブジェクトの作成
- 通知の実施
実装のポイントは以下の点です。
- 必ず最初に通知チャンネルを作成する。
通知チャンネルが存在しない状態で、通知を実施するとエラーになる。 - CHANNEL_IDで通知の関連付けを行っている。
通知チャンネルと同じIDを指定して、通知を実施しないとエラーになる。
また、通知タップによりアプリ起動するため、Intentを作成して通知オブジェクトにセットしています。
class MainActivity : AppCompatActivity() {
    val CHANNEL_ID = "sample"

    //通知チャンネルの作成
    private fun createNotificationChannel() {
        if (Build.VERSION.SDK_INT >= Build.VERSION_CODES.O) {
            val name = "name"
            val descriptionText = "description"
            val importance = NotificationManager.IMPORTANCE_DEFAULT
            val channel = NotificationChannel(CHANNEL_ID, name, importance).apply {
                description = descriptionText
            }
            // Register the channel with the system
            val notificationManager: NotificationManager =
                    getSystemService(Context.NOTIFICATION_SERVICE) as NotificationManager
            notificationManager.createNotificationChannel(channel)
        }
    }

    override fun onCreate(savedInstanceState: Bundle?) {
        super.onCreate(savedInstanceState)
        setContentView(R.layout.activity_main)

        //通知を作成する前に必ず実行する
        createNotificationChannel()

        //通知を作成するボタン
        val buttonNotification: Button = findViewById(R.id.buttonNotification)
        buttonNotification.setOnClickListener {
            // 通知タップ時の遷移先を設定
            val intent = Intent(this, MainActivity::class.java).apply {
                flags = Intent.FLAG_ACTIVITY_NEW_TASK or Intent.FLAG_ACTIVITY_CLEAR_TASK
            }
            val pendingIntent: PendingIntent = PendingIntent.getActivity(this, 0, intent, 0)

            //通知オブジェクトの作成
            var builder = NotificationCompat.Builder(this, CHANNEL_ID)
                    .setSmallIcon(R.drawable.ic_launcher_foreground)
                    .setContentTitle("Title")
                    .setContentText("Text")
                    .setPriority(NotificationCompat.PRIORITY_DEFAULT)
                    .setContentIntent(pendingIntent)
                    .setAutoCancel(true)

            //通知の実施
            val notificationManager: NotificationManager =
                    getSystemService(Context.NOTIFICATION_SERVICE) as NotificationManager
            notificationManager.notify(0, builder.build())
        }
    }
}
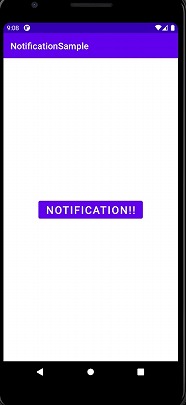
実行結果
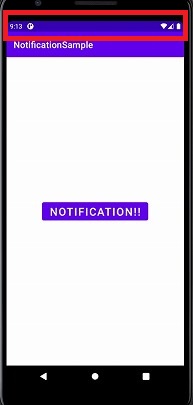
アプリ起動時
ボタンを押して通知を実施します。
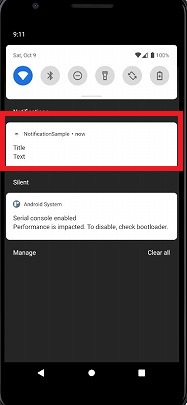
ボタンを押したとき
通知バーに通知が表示されました。
通知をタップしたとき
通知が消え、アプリが起動されました。
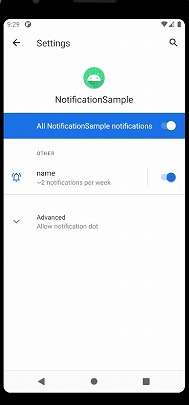
実装に誤りがないのに通知が表示されない場合…
アプリの通知設定がOFFになっているかもしれません。
以下の手順でアプリの通知が許可されているか確認してみましょう。
- アプリアイコンを長押し
- 「App Info」をタップ
- 「Notifications」をタップ
- 「All (アプリ名) notifications」をONにする
まとめ
NotificationCompatを用いた、通知の実装方法を説明しました。
Android8.0から仕様が変わっており、必ず通知チャンネルを最初に作成する必要があります。また、通知にはIDの設定も必要となり、IDによって通知を管理しています。
実装方法に誤りがないにも関わらず通知が表示されない場合は、アプリの通知設定を確認してみましょう。