FragmentクラスのonAttachを用いたコールバックの実装方法を説明しています。この方法でFragmentからActivity側のメソッドを実行することが出来ます。また、DialogFragmentでも同様に実装可能です。
概要
FragmentからActivity(呼び出し元)のメソッドを実行します。
初めに以下の準備が必要となります。
- Fragment側に実行したいメソッドを定義したインタフェースを作成する
- Fragment側のonAtatchをoverrideして、インタフェースで定義したメソッドをセットする
- Activity側でインタフェースで定義したメソッドをoverrideして実装する
ここまで出来たら、Fragmentの中の必要なタイミングで実行します。
実装例
レイアウト
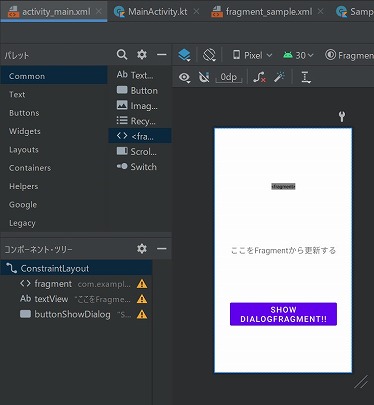
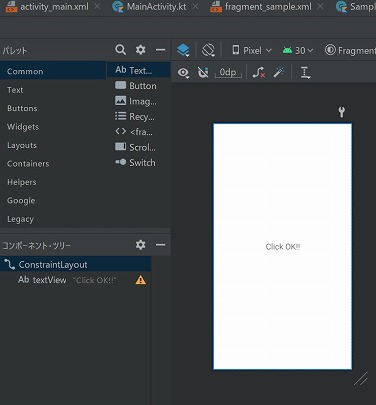
activity_main.xml
メインアクテビティのレイアウトです。
上から順番にfragment、TextView、Buttonの3つです。
- fragment
fragmentの領域、fragment内のボタンを押すとTextViewを更新する - TextView
コールバックの動作確認する - Button
dialogを表示する、dialog内のボタンを押すとTextViewを更新する
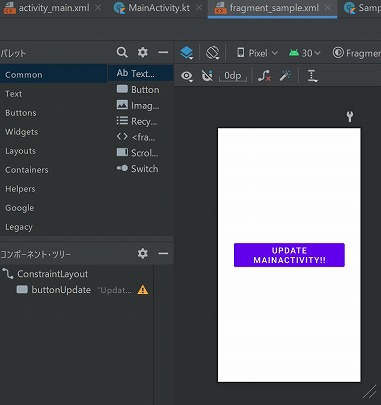
fragment_sample.xml
フラグメントのレイアウトです。
ボタンを押すと、メインアクテビティのテキストの表示内容を更新します。
dialog_sample.xml
ダイアログのレイアウトです。
Positiveボタン(OKボタン)を押すと、メインアクテビティのテキストの表示内容を更新します。
実装方法
SampleFragment.kt
実装のポイントは以下の点です。
- クラス内で参照できるようにListenerの変数を定義
- Interfaceでメソッドを定義
→MainActivityでoverrideする - onAttachでListenerの変数にセット
→MainActivityでoverrideしたListenerをセットする - ボタンを押したときにInterfaceで定義したメソッドを実行
class SampleFragment : Fragment() {
    //Listenerをセットする変数
    private lateinit var listener: CallbackListener

    //実行するメソッドを定義したInterface
    interface CallbackListener {
        fun updateButtonClickFromFragment()
    }

    //この中でListenerにセットする
    override fun onAttach(context: Context) {
        super.onAttach(context)
        try {
            //MainActivity(呼び出し元)をListenerに変換する
            val mainActivity: MainActivity = activity as MainActivity
            listener = mainActivity
        } catch (e: ClassCastException) {
            throw ClassCastException((context.toString() +
                    " must implement NoticeDialogListener"))
        }
    }

    override fun onCreateView(
        inflater: LayoutInflater,
        container: ViewGroup?,
        savedInstanceState: Bundle?
    ): View? {
        val root: View = inflater.inflate(R.layout.fragment_sample, container, false)

        //更新用ボタン
        val buttonUpdate: Button = root.findViewById(R.id.buttonUpdate)
        buttonUpdate.setOnClickListener {
            listener.updateButtonClickFromFragment()
        }

        return root
    }
}
SampleDialogFragment.kt
Fragmentと実装方法は変わりありません。
class SampleDialogFragment : DialogFragment() {
    //Listenerをセットする変数
    private lateinit var listener: CallbackListener

    //実行するメソッドを定義したInterface
    interface CallbackListener {
        fun updateButtonClickFromFragmentDialog()
    }

    //この中でListenerにセットする
    override fun onAttach(context: Context) {
        super.onAttach(context)
        try {
            //MainActivity(呼び出し元)をListenerに変換する
            val mainActivity: MainActivity = activity as MainActivity
            listener = mainActivity
        } catch (e: ClassCastException) {
            throw ClassCastException((context.toString() +
                    " must implement NoticeDialogListener"))
        }
    }

    override fun onCreateDialog(savedInstanceState: Bundle?): Dialog {
        return activity?.let {
            val builder = AlertDialog.Builder(it)
            val inflater = requireActivity().layoutInflater;
            val root = inflater.inflate(R.layout.dialog_sample, null)

            //viewにレイアウトをセット
            builder.setView(root)
                .setPositiveButton("OK",
                    DialogInterface.OnClickListener { dialog, id ->
                        listener.updateButtonClickFromFragmentDialog()
                    })
                .setNegativeButton("CANCEL",
                    DialogInterface.OnClickListener { dialog, id ->
                        getDialog()?.cancel()
                    })
            builder.create()
        } ?: throw IllegalStateException("Activity cannot be null")
    }
}
MainActivity.kt
Fragmentのインタフェースで定義したメソッドをoverrideして実装しています。
- updateButtonClickFromFragment
Fragmentで定義したメソッド - updateButtonClickFromFragmentDialog
FragmentDialogで定義したメソッド
//FragmentのListenerを継承する
class MainActivity : AppCompatActivity()
    , SampleFragment.CallbackListener
    , SampleDialogFragment.CallbackListener {

    //Fragmentのボタンを押したときの処理
    override fun updateButtonClickFromFragment() {
        val textView: TextView = findViewById(R.id.textView)
        textView.text = "Update From Fragment!!"
    }

    //FragmentDialogのボタンを押したときの処理
    override fun updateButtonClickFromFragmentDialog() {
        val textView: TextView = findViewById(R.id.textView)
        textView.text = "Update From FragmentDialog!!"
    }

    override fun onCreate(savedInstanceState: Bundle?) {
        super.onCreate(savedInstanceState)
        setContentView(R.layout.activity_main)

        //Dialog表示ボタン
        val buttonShowDialog: Button = findViewById(R.id.buttonShowDialog)
        buttonShowDialog.setOnClickListener {
            val newFragment = SampleDialogFragment()
            newFragment.show(supportFragmentManager, "test")
        }
    }
}
実行結果
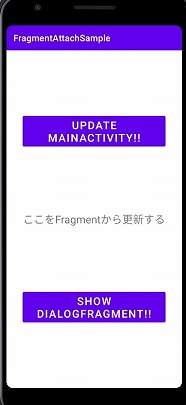
アプリ起動時
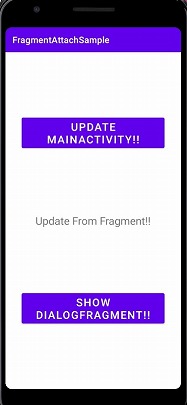
Fragmentのボタンを押したとき
Fragment内のボタン(画面上部)を押すと、中央のテキストの表示が変わっています。FragmentからActivityの更新が行えていることが分かります。
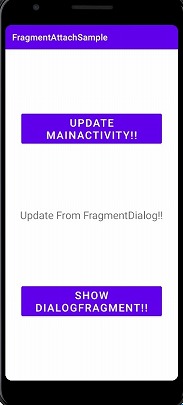
DialogFgmentのボタンを押したとき
DialogFragment内のOKボタンを押すと、中央のテキストの表示が変わっています。DialogFragmentからActivityの更新が行えていることが分かります。
まとめ
FragmentクラスのonAttachを用いたコールバックの実装方法を説明しました。
説明した実装方法を用いると、FragmentからActivity側のメソッドを実行することが出来ます。また、DialogFragmentでも同様に実装可能です。
要点は以下の通りです。
- Fragment側のInterfaceでメソッドを定義する
- Activity側でメソッドを実装する
- onAttachで実装したメソッドを取得して、Fragment側で実行する
Fragment(遷移先)からActivity(呼び出し元)を操作したい場面で活用しましょう。